A practical guide to shortening and reframing a software walkthrough into a website cut, a portrait social clip and a support snippet without losing the action or the proof on screen.
This guide contains buttons labeled Affiliate link, and if you buy through them, Gen AI Tools may earn a commission. Commissions do not buy an independent verdict, and recommendations reflect documented task fit. How we work.
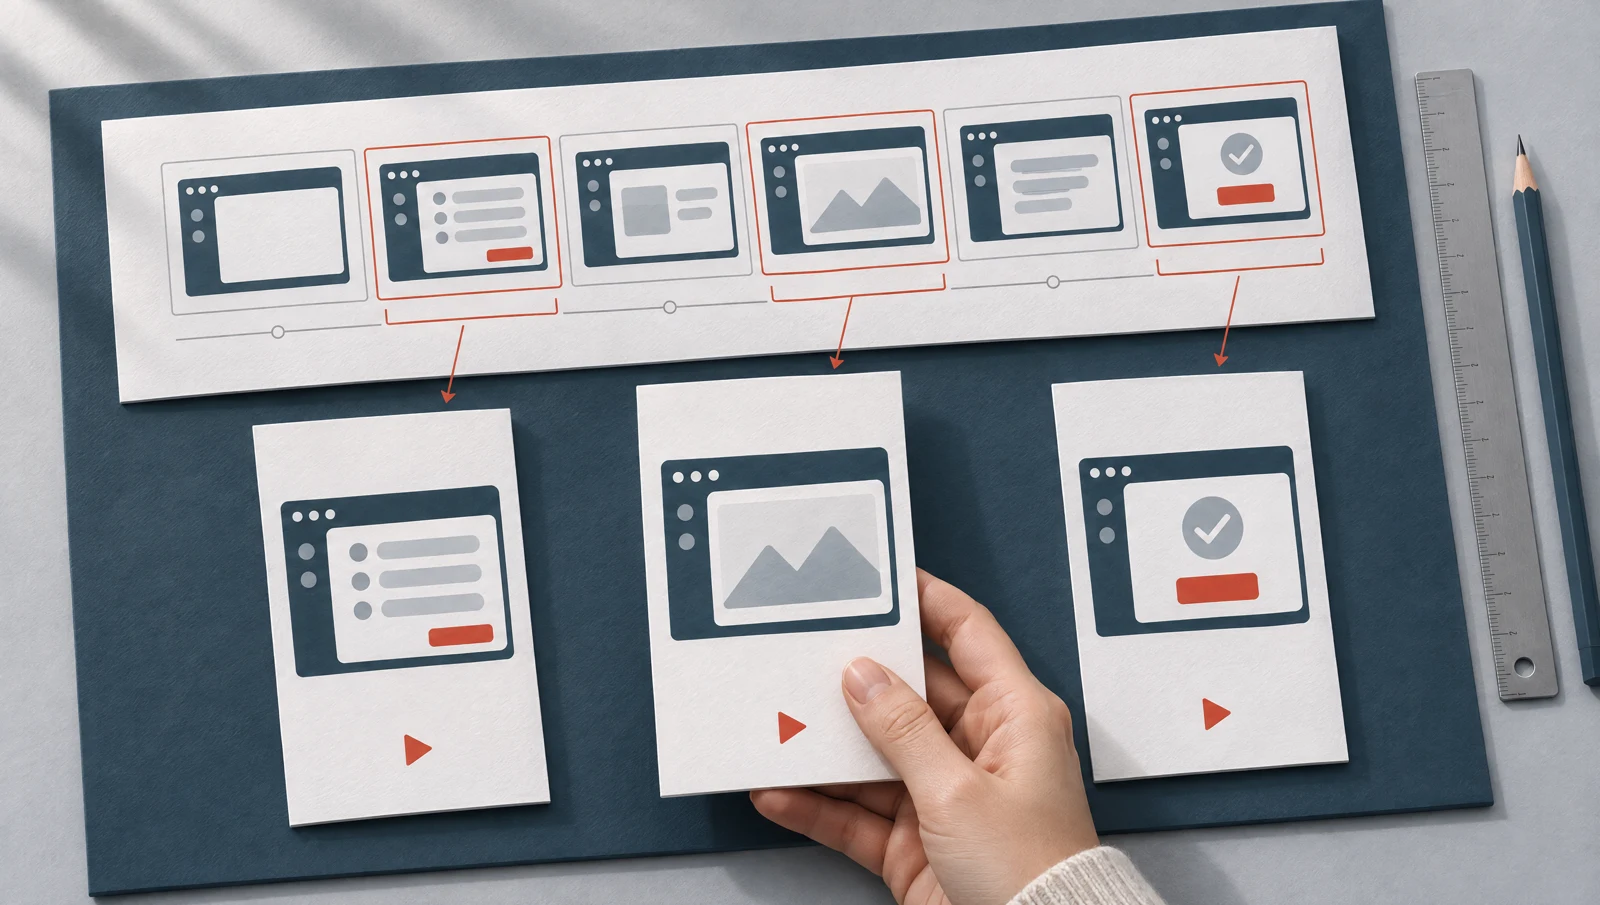
AI-generated editorial illustration. Product examples are shown separately below.
The short answer
For a long narrated demo, let OpusClip or Vizard propose short clip candidates, then keep only those that show both the action and its result. If you have already chosen a short interface sequence, edit it precisely in Descript, using its transcript or multitrack editing. Finish crops and formats in Canva, or use VEED if you prefer a browser editor.
OUR RECOMMENDATION
Which tool fits your next step?
Decide whether you need help finding moments or shaping one you chose.
Start with OpusClip or Vizard when a long narrated demo or webinar needs mining. Both suggest clips, reframe for vertical formats and add captions. Treat every suggestion as a draft and check that it shows cause and result.
Picks are candidates, not finished clips; no tool guarantees reach.
Choose Descript when you know which moment you want and need exact cuts. Edit through the transcript or multitrack timeline, remove filler words and add captions, then export the short version for the next step.
Silent sequences give the transcript little to work with; use the timeline.
Finish in Canva when the clip needs cropping, or resizing with Magic Switch for another format. VEED is the alternative if you want a single browser workspace to edit, record, add subtitles and generate clips, which you then review like any other draft.
After any crop, check that the interface stays readable and the clip still shows the action and its result.
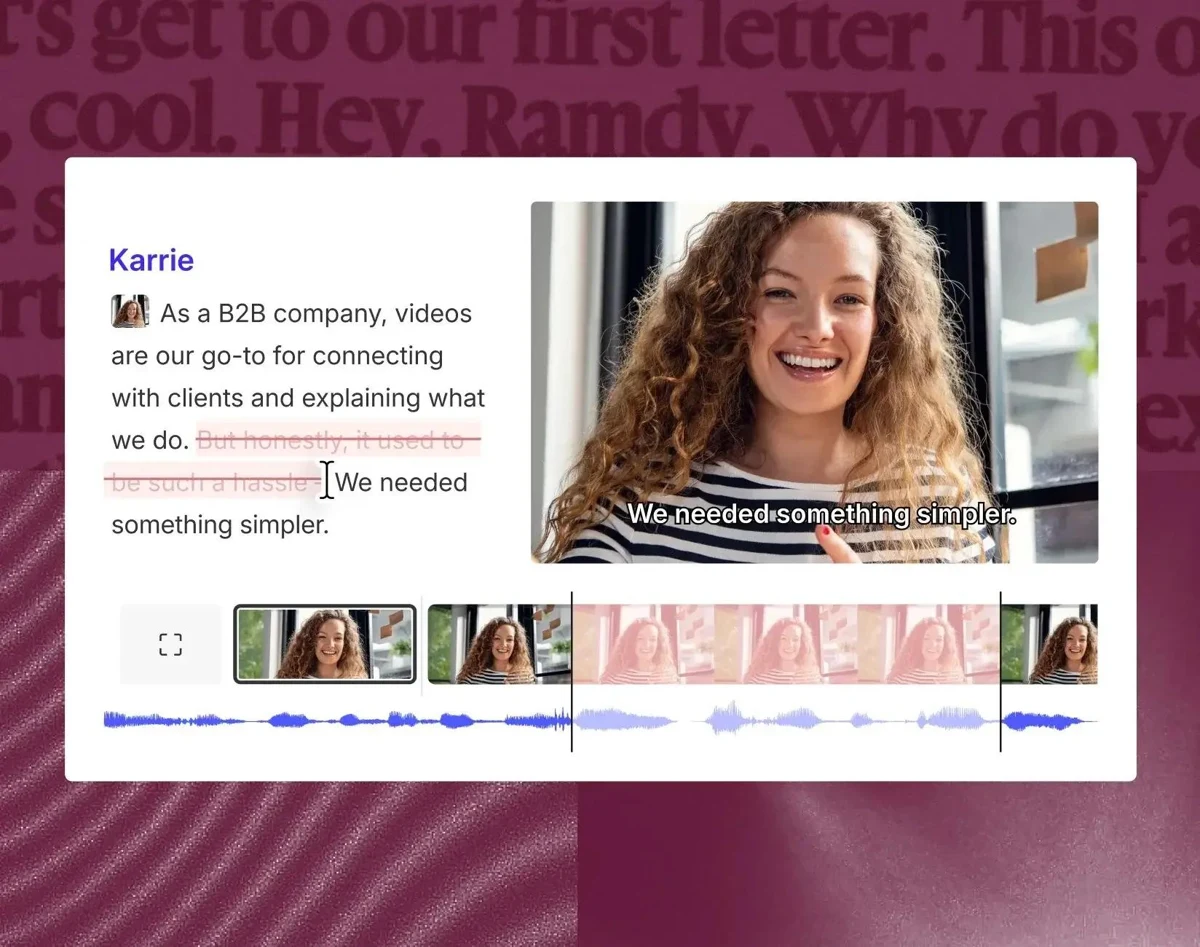
Descript suits a long walkthrough with a voiceover. Its Create Clips feature looks for moments in uploaded long-form audio or video, and you can refine each suggestion by hand. You can also edit the video by editing its transcript, adjust scenes and layouts, and work on a timeline. Treat suggested clips as a starting point: a suggestion can open after the click that matters or end before the confirmation appears. The free plan is limited, so check credits, watermark and export resolution on the pricing page before you plan a batch of exports.
Canva fits when you already know which seconds to keep and need a deliberate layout. You can upload a clip, crop it with manual handles, trim it and add overlays such as labels or a brand frame. Manual crop gives you control over what stays in view. Magic Switch, the one-click resize, requires Canva Pro and changes the design size; it does not decide which part of your interface matters, so check the framing after any resize.
Descript’s official text-based editing illustration. Publisher example, not a result from our tests. Source: Descript.
Example: one fictional demo, three cuts
We built a silent, fictional Alder Desk storyboard about approving one campaign asset. It runs 36 seconds as six scenes of 6 seconds each: intro (0-6), open asset (6-12), assign owner (12-18), request review (18-24), approval confirmation (24-30) and closing (30-36). The website cut keeps 6-30, or 24 seconds, so the whole action chain survives. The portrait social clip keeps 12-30, or 18 seconds, focused on owner, review and approval, with on-screen labels and the asset card reframed rather than cut off. The support snippet keeps 18-30, or 12 seconds, to answer one question: how do I request a review and confirm approval? You can download the cut list as a CSV and adapt it.
These are illustrative editorial cuts we made from our own fictional interface. They are not outputs from Descript, Canva or any real app, and we did not run an AI trial or measure results. The durations are our suggestions, not platform limits. Adjust every timing to your real footage.Read the six scenes in the source video
00 to 06sAlder Desk campaign board
The campaign board lists assets waiting for a decision.
06 to 12sOpen the asset
The banner draft opens with its status set to In progress.
12 to 18sAssign an owner
The owner field now reads Marketing team.
18 to 24sRequest a review
The status changes to Review requested.
24 to 30sApproval confirmed
A green Approved label appears on the asset card.
30 to 36sBack to the board
The board now shows the banner with its Approved status.
A landscape screen recording shrinks to unreadable detail in a vertical feed, and a center crop often cuts off the button or status label that proves the point.
Pick the shortest run of steps that tells one complete story, ending on the visible confirmation.
Crop or reposition each scene so the active card, field or label sits inside the portrait frame, even if the rest of the window is lost.
Add a short on-screen label to each step so viewers understand what changed without sound.
What to aim for: A readable vertical clip where the key interface element and its result stay in view throughout.
18 secondsSource 00:12 to 00:30Reframed around the asset card
Our fictional Alder Desk example, cut from the same 36-second source. Silent editorial storyboard, not a result from a named AI tool.
Watch the full demo once and write down each moment where something changes on screen. For each change, note the timestamp of the action and the timestamp of the visible result.
Choose one job per clip
Decide what each version must do: show the full flow, catch attention in a feed, or answer one support question. A clip with one job is easier to cut and easier to judge.
Cut around proof, not pauses
Keep the frame that confirms each step worked, such as a status label or a saved field. Remove loading time, mouse wandering and repeated explanations instead.
Reframe with intent
For portrait or square versions, follow the active element from scene to scene. If a crop would hide the result, scale or reposition the scene so the result stays readable.
Label and caption
Add short on-screen labels so the clip works muted. If you generate captions from a transcript, read them against the video and correct product names, feature names and interface terms by hand.
Adapt these instructions to your footage. They are editorial prompts, not results from a product trial.
Brief for a transcript-based editor
Find moments in this walkthrough where a step is completed and its result is visible. Each clip should start just before the action and end after the confirmation appears. Flag any clip that ends before the result is on screen.
Brief for a layout and crop pass
Reframe this excerpt to portrait. Keep the active card and its status label inside the frame in every scene. Add a short label for each step and keep the brand frame clear of interface text.
Before you share the clips
Every clip ends on a visible result, not mid-action.
The key button, field or label is fully inside the frame in every reframed scene.
Captions and labels spell product and feature names correctly.
The clip makes sense when played without sound.
Nothing on screen shows real customer data, personal details or internal notes.
Export resolution and watermark match what you intend to publish.
Answers on finding the right moments, reframing for vertical and checking every clip before it goes out.
How do I turn a long demo into short clips?
Let OpusClip or Vizard propose candidates from a narrated recording, or mark the moments yourself. Vizard says it transcribes, finds highlights and reframes for vertical formats. Keep only clips that show the action and its visible result, trim loading and mouse wandering, and add short labels so each clip works muted.
How do I pick the best moment from a long recording?
Watch once and note each timestamp where something changes on screen, plus the timestamp where the result appears. A good clip starts just before the action and ends after confirmation. Choose one job per clip, such as a full flow or a single support answer, then cut around proof rather than pauses.
As checked on 13 November 2026, OpusClip lists Starter at USD 15 billed monthly, with 150 credits a month and watermark removal. The Free plan gives 60 credits a month, adds a watermark, has no editing, and clips are no longer exportable after three days. Credits are not the same as clip counts. Test one real demo before you buy.
How do I make a vertical clip without cutting off the button?
Do not rely on a center crop. In Canva, crop with manual handles and reposition each scene so the active card, field or status label stays inside the portrait frame. Magic Switch, which needs Canva Pro, can resize a design, but it does not choose what matters, so recheck framing after any resize. Add short step labels.
How do I get captions that spell product names correctly?
Generate captions from the transcript, then read them against the video and correct product, feature and interface terms by hand. Descript and VEED both offer captions or subtitles in the editor. Check that captions do not cover the button being clicked, and that the clip still makes sense without sound.
Often a pair works: one tool to find and cut moments, another to crop, brand and finish. For example, OpusClip for candidates and Canva for layout. Avoid overlapping subscriptions; if one editor like Descript covers cutting and captions, start there and add a second only for a gap you can name.
Can I remove filler words and dead time from the narration?
Yes, in a transcript-based editor. Descript lists filler-word removal and lets you cut video by editing the text, then fine-tune on a timeline. Deleting words can leave a jump in the screen action, so replay the cut and check the on-screen state still follows the click.
Yes, and a webinar usually gives automatic tools more speech to find moments in. Upload one real recording to your top two options, compare the clips you would genuinely post, and note credits used, watermarks and cleanup time. Still verify that each clip ends on a visible conclusion.
Can I publish clips directly from the editing tool?
Vizard says you can download clips, share them as links or publish directly from the app. Treat that as a final step, not an automatic one: review each clip, confirm captions and that no customer data is visible, and check which accounts are connected. Export resolution and watermark depend on your plan.
Vizard lists caption translation in its editor, and VEED can translate subtitles from a recording. Review every translated line with the video playing, keeping interface labels exactly as shown on screen. For a fully dubbed voice rather than captions, use a dedicated dubbing workflow and treat it as a separate step.
Do automatic clips work for silent interface footage?
Narrated demos give them more to work with, since speech marks the moments. Vizard starts by transcribing; OpusClip says its model also reads visual cues in videos with little dialogue. For silent screen sequences, choose moments yourself and keep automation for reframing and captions.
This guide explains a method, not a tool ranking. Tool descriptions are based on the official pages listed in our sources, checked on 12 November 2026. We have not run a new hands-on test of Descript or Canva for this guide. The Alder Desk example is fictional and its cuts are our own editorial choices.
Disclosure: Descript buttons labeled Affiliate link in this guide are PartnerStack referral links that may earn Gen AI Tools a commission on qualifying purchases. No placement in this guide was purchased, official source links stay direct, and Descript is included for its documented fit for the task.


 Descript
 Canva
 OpusClip or
 Vizard when a long narrated demo or webinar needs mining. Both suggest clips, reframe for vertical formats and add captions. Treat every suggestion as a draft and check that it shows cause and result.
A portrait clip for social feeds
A landscape screen recording shrinks to unreadable detail in a vertical feed, and a center crop often cuts off the button or status label that proves the point.
What to aim for: A readable vertical clip where the key interface element and its result stay in view throughout.